
This page shows how to install the real-time dongle in your electricity meter if you got it from your electricity company. If you are a Home Assistant user with an Elveta real-time dongle, see the Home Assistant installation instructions instead.
Select which type of electricity meter you have. If uncertain, check out Port Information: RJ12, RJ45 & Kamstrup.
Contact your local electricity network operator and ask them to activate the customer port on your electricity meter. The real-time dongle can't receive any data until the port is activated. You can continue with the steps below in the meantime.
Make sure that your Wi-Fi network meets the Wi-Fi requirements, for example that it uses 2.4 GHz and reaches the electricity meter.
Connect the real-time dongle to the electricity meter's customer port with the supplied cable: the RJ12 cable if the meter has a P1 port, or the RJ45 cable if it has a HAN port. The real-time dongle is normally powered by the electricity meter. If its LED stays off, the meter can't supply enough power; connect a USB-C charger to the real-time dongle.
Open your electricity company's app and follow the instructions to add the real-time dongle. If your electricity company doesn't have an app, use the free Elveta Connect app. The app connects to the real-time dongle over Bluetooth and sends your Wi-Fi details to it.
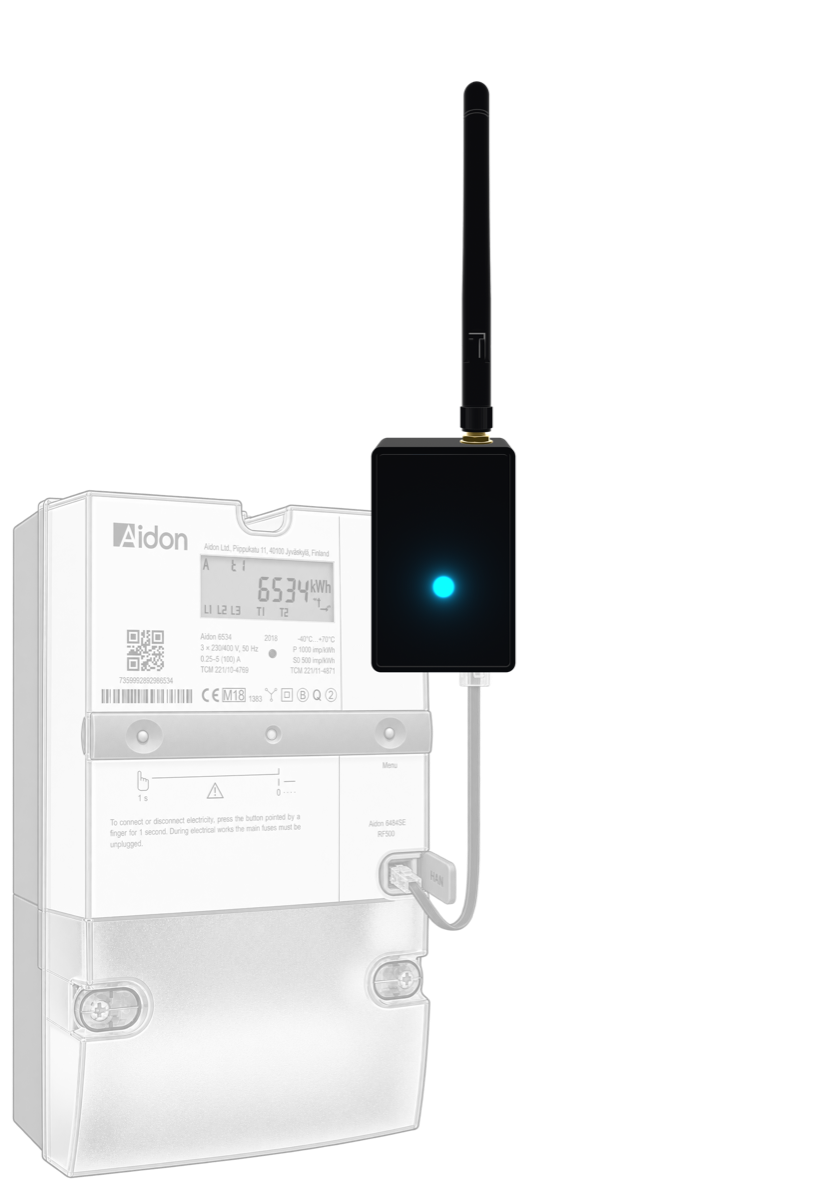
Contact your local electricity network operator and ask them to activate the customer port on your electricity meter. They may ask which mode to activate: HAN P1 (RJ12), HAN-NVE (RJ45), or DLMS push 1. We recommend HAN P1 (RJ12), which typically provides more data points and faster data transfer from the meter. The real-time dongle can't receive any data until the port is activated. You can continue with the steps below in the meantime.
Make sure that your Wi-Fi network meets the Wi-Fi requirements, for example that it uses 2.4 GHz and reaches the electricity meter.
Open your electricity company's app and follow the instructions to add the real-time dongle. If your electricity company doesn't have an app, use the free Elveta Connect app. The app connects to the real-time dongle over Bluetooth and sends your Wi-Fi details to it.
Remove the plastic cover over the module slot at the top of the Kamstrup OMNIPOWER® meter. If the cover is sealed, ask your local electricity network operator for permission before you remove it. Slide the real-time dongle carefully into the slot so that it connects to the meter's internal connector, as shown in the picture. When inserted, give it an extra push to make sure it is fully inserted into the slot. The real-time dongle is powered by the electricity meter, so no cable is needed.
The real-time dongle for Kamstrup OMNIPOWER® meters has an RJ12 expansion port that passes on the data from the electricity meter. This lets you connect a second P1 dongle if needed, for example for load balancing. The expansion port only provides data, not power, so the second dongle needs its own power supply.
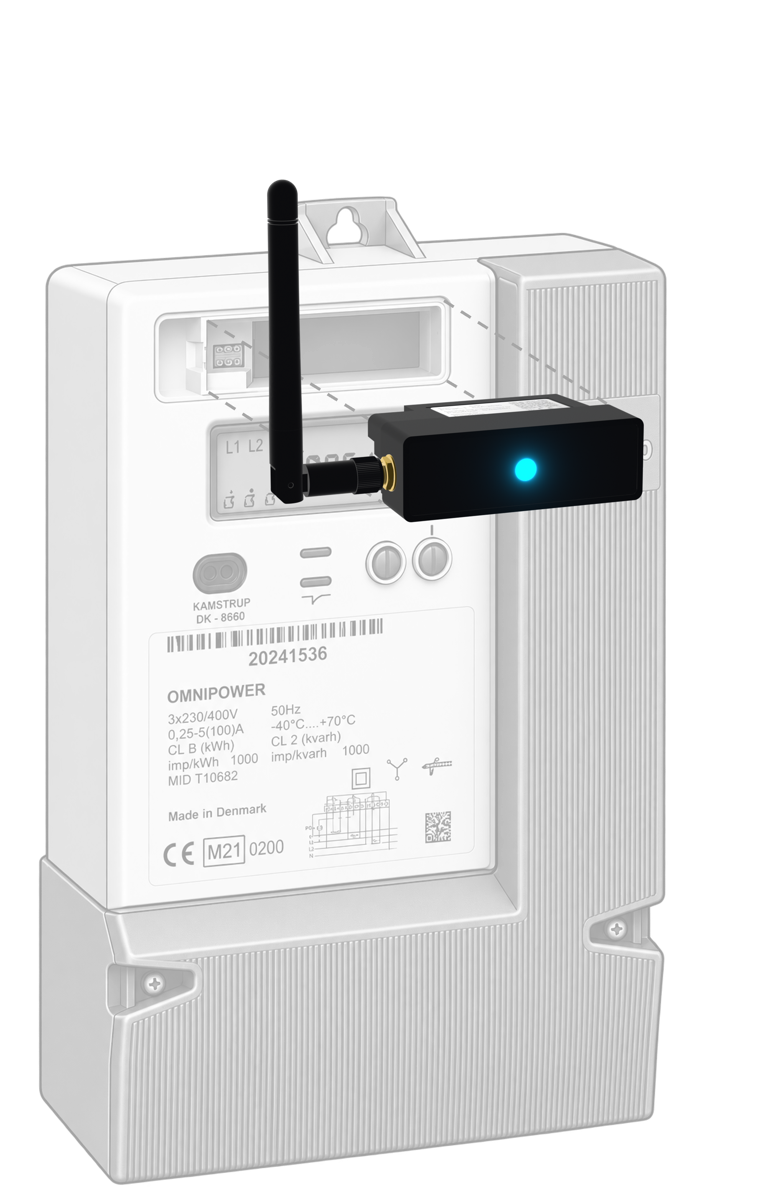
When the real-time dongle's LED shows steady green, it is receiving data from the electricity meter and is connected. See Status Indications for what the other colors mean.
Would you like to know more? Please contact us below.
Elveta is developed and operated by Picofrost AB. Read more at www.picofrost.com
+46 10-430 03 14
Täby, Sweden